Now you can create effortless screen designs using Context menu in Tink. In this post, we will check features of the context menu.
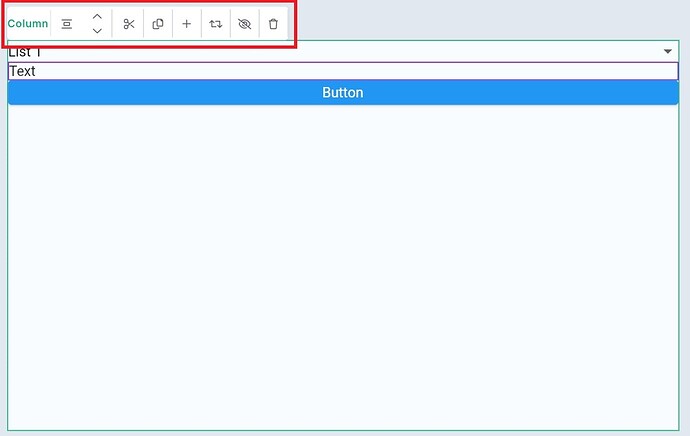
Click any widget on the screen and you will get a Context Menu like this…
Context menu starts with the name and icon of the widget. The above menu displays Column widget.
Let’s check menu items from the context menu in Tink one by one!
- You can move the widget up or down within a Column with the up-down arrows. This helps to reposition a particular widget in a column. Just select the widget and move it up or down by clicking the menu item highlighted in the below image.
- Positioning the child widgets is also possible using cut, copy and paste options. Cut option cuts the widget from the screen. You may paste it on the screen later. If you want to replicate a widget with certain properties, simply copy the widget using copy menu item.
- Paste the copied widget using the Paste menu item. The widget gets pasted at the bottom of the column.
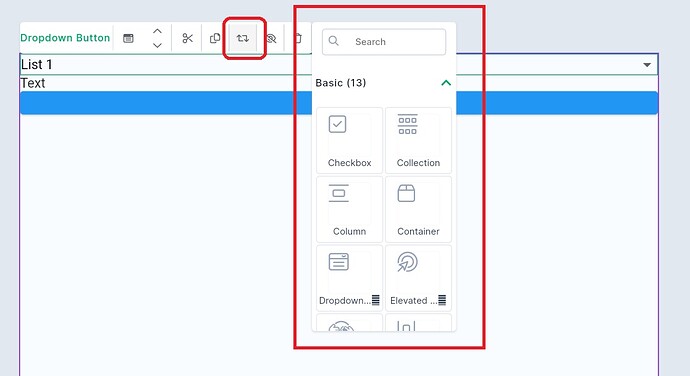
- Replace the widget with the swap menu item. When the menu item is clicked, another menu appears to select the widget for swapping.
- Choose to close the context menu by clicking the highlighted menu item as shown below.
- Delete the menu item with a single click. Use delete menu item from the context menu to delete widget from the screen.
- Add a child widget to Row or Column by clicking
+menu item.

Using the context menu in Tink is easy! Simply create app designs in Tink - no code way!


